

Shopify is one of the easiest and best E-commerce website builders in the world.
If this is your first time using Shopify, or your first time building a website entirely, there is a learning curve.
We will help you with a complete step-by-step guide on how to setup your first Shopify website. By the end of this article, you’ll be able to setup your Shopify store, with products listing.!
So Let’s get started.
Note: We assume you have picked a product to sell.
1 Plan Your Product Store on a paper.
2 Choose a Name for Store
3 Create A Shopify Account
4 Select your Shopify Theme and start Customizing
5 Optimize Your Store’s Settings
6 Create your important Pages
7 Add Products To Your Store
8 Create Your Store’s Collections
9 Add Discount Codes
10 Get Familiar With Your Orders Page
11 Setup Google Analytics and Review Your Analytics
12 Add These Recommended Apps
13 Choose A Paid Plan
1 Plan Your Product Store on a paper.
Create a Planning Checklist
- Write your income goal.
- Speak with your business partner/consultants to role out the logistics.
- Decide if this will be a part of existing business, small venture or your main business.
- Decide how much time and money you have to invest in this project.
- Create a clear mindmap of website for how things will be organized.
2 Choose a Name for Store
Your Brand Name (store’s name) is a big deal! It’s your brand the soul of your business.
Note: Your store name(Brand) does not need to be the same as your legal entity name, but if it’s different, you have to check with your legal consultant for any local registration.
While we are on that subject, most new entrepreneurs wonder if they need to register the business before opening their store. Technically, no – you don’t have to worry about your business being a “business” until you’re making money. Our advice is to not let registering your business stop you from starting the project. Once you start making money you can register your business.
Disclaimer: This is not a Legal advice. Talk to the local business attorney in your area for this, review your jurisdiction’s laws.
Here are few tips on how to name your store:
- Keep it short and simple (less than 12 characters if possible).
- Make it easy to remember (and pronounce).
- Keep it original (don’t copy any other brand name).
- The most important tip is to keep your product offerings (current and future) in mind.
Note: These tips are just that – tips. You can toss them to the wind and have a longer or crazier name. So be creative!
Now its time to open your laptop and register a domain name for your brand.
Registering a Domain Name
Your domain name is what your customers type in the browser’s URL bar to visit your store (i.e., www.gloify.com). In most cases, your domain name should be your store name (i.e., www.yourstorename.com).
You can register your domain name through Shopify (the easiest method and the one we recommend) or you can register it through a third-party like Godaddy or Namecheap. (This could be less expensive, but more complicated as you’ll have to change your domain name server [DNS] settings).
Note: Check to make sure the domain name is available before you settle on with the store name! There’s nothing worse than finding the perfect name for your product, only to realize the .com is taken.
3. Create a Shopify Account
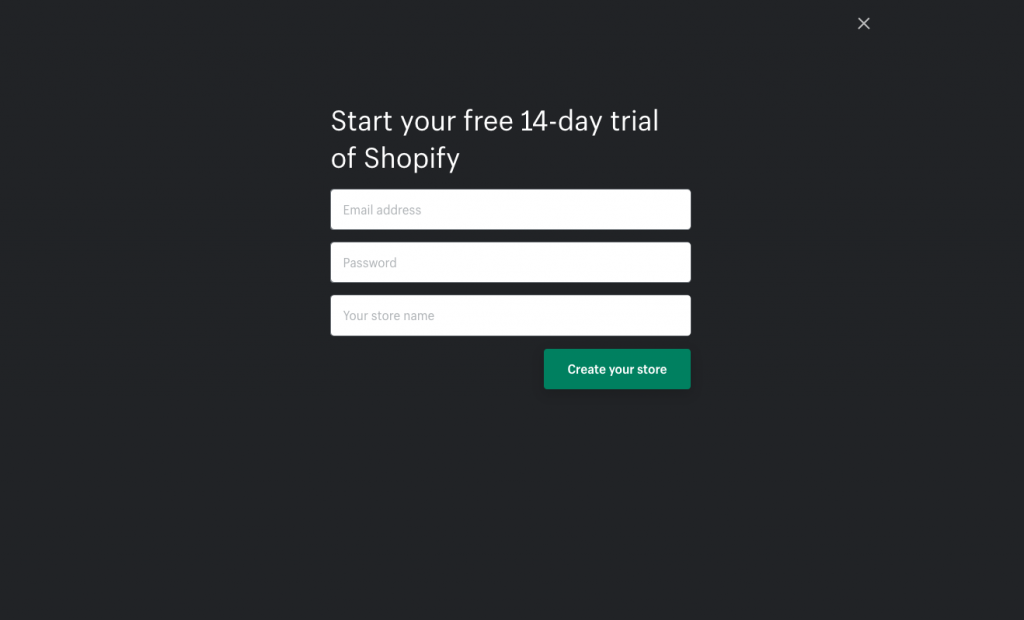
Go to Shopify to start a 14-day free trial. Enter your email, password, and store name (you can change your store name later if wish).
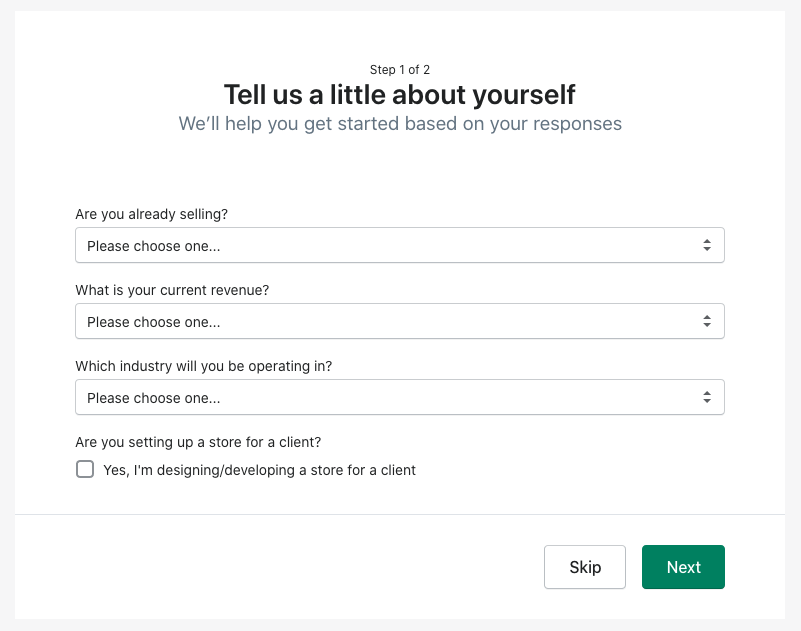
Follow the simple steps and finish the registration process, you’re all set!
4. Select and Customize your Shopify Theme
There are many options and things to do. Don’t worry, we have cover most of it in this article. The only thing you should focus on right now is your store’s theme.
A theme is a pre-created website design you can add to your store to make it look good without writing code. There are hundreds of themes to choose from; some are better than others. You also have the option to use many third-party developers themes that aren’t in the Shopify theme store.
To edit your store’s theme, click on the Online Store > Themes then click the Visit Theme Store button.
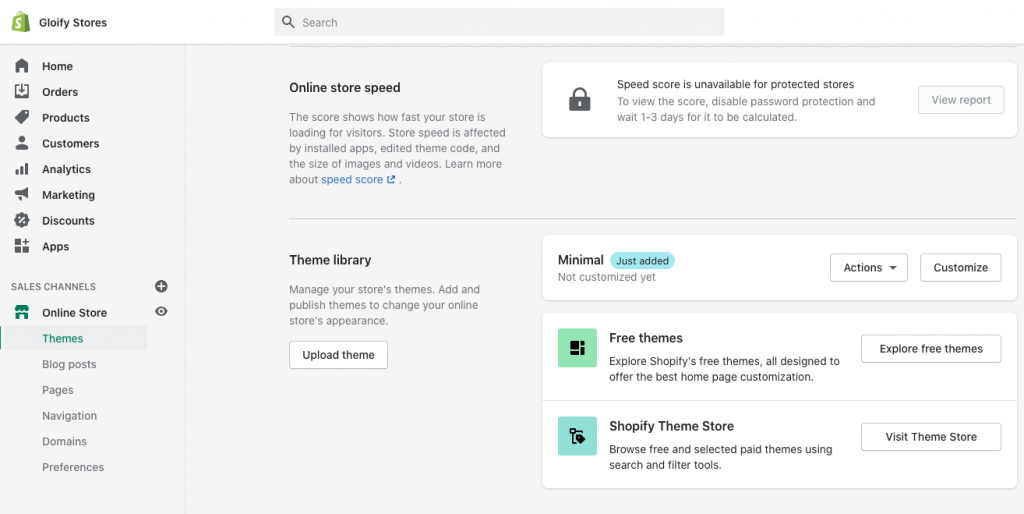
You’ll have to go to Shopify’s theme store, which has free and paid themes.
RECOMMENDED THEMES
To help you save time so you don’t have to wade through hundreds of themes to find one you like, here are some themes I recommend; some are free, some are paid. I prefer a minimalistic design since they’re easy to edit and look great with minimal effort (pun definitely intended).
1. Minimal Theme
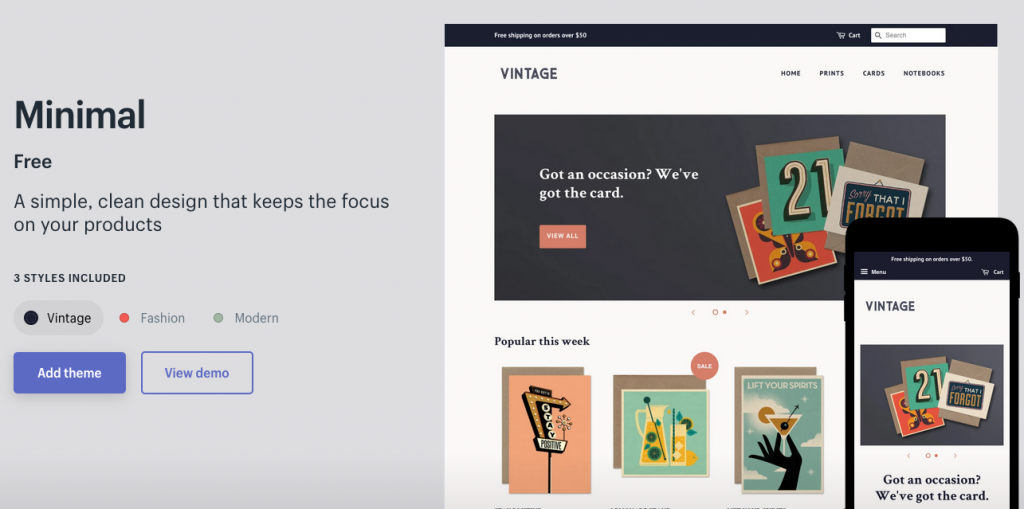
This Theme’s Cost: Free
Like its name, this is a minimalistic theme with few bells and whistles. It’s clean, easy to use, and looks darn good. More is often less — and that’s why I love this theme.
2. Startup Theme
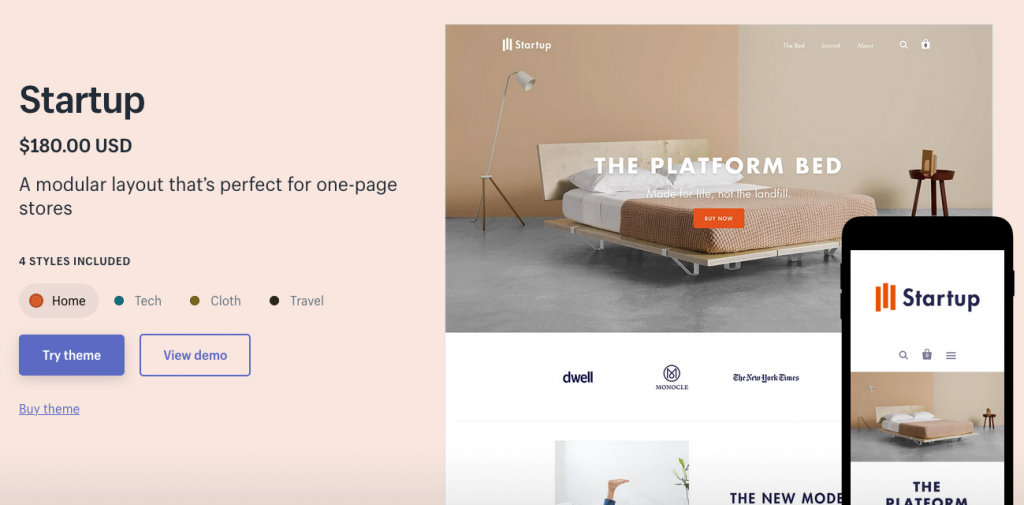
This Theme’s Cost: $180
Startup theme is like Minimal, is a clean and modern theme. It’s ideal for single-product stores, or stores with only a few products. It’s flexible, fast, and responsive — all great things. For more options go through the library and choose the best option suited for your store.
Customizing your Theme
Once you finalize a theme, it’s time to customize it as per your needs!
To customize your theme, go back to Online Store > Themes and click the blue Customize button. Make sure the theme you customize is the one you chose in the theme store.
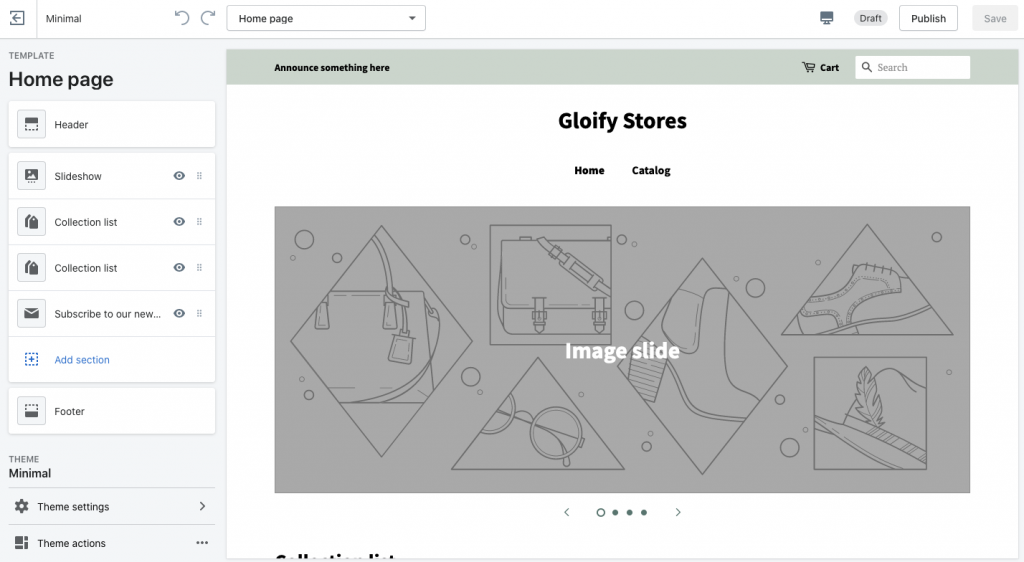
Above screenshot showing Gloify’s sample stores Shopify theme customization
Note: If you don’t see your theme as the Current theme, scroll down and click the Actions drop-down, then Publish to activate it.
Pro Tip: You can add your logo to your Shopify store now. If you don’t have a logo, check out Shopify’s free logo generator tool, Hatchful. Alternatively, you can hire someone on Fiverr or 99Designs to create your logo.
After setting up your store to your liking, move on to optimize your settings.
5. Optimizing your store’s settings
Shopify’s comes with a optimized default setting which is great, but there are some things to add and change to make the most out of your new shiny store!
Let’s go through the step-by-step process. Start by clicking the Settings button at the bottom left of your dashboard.
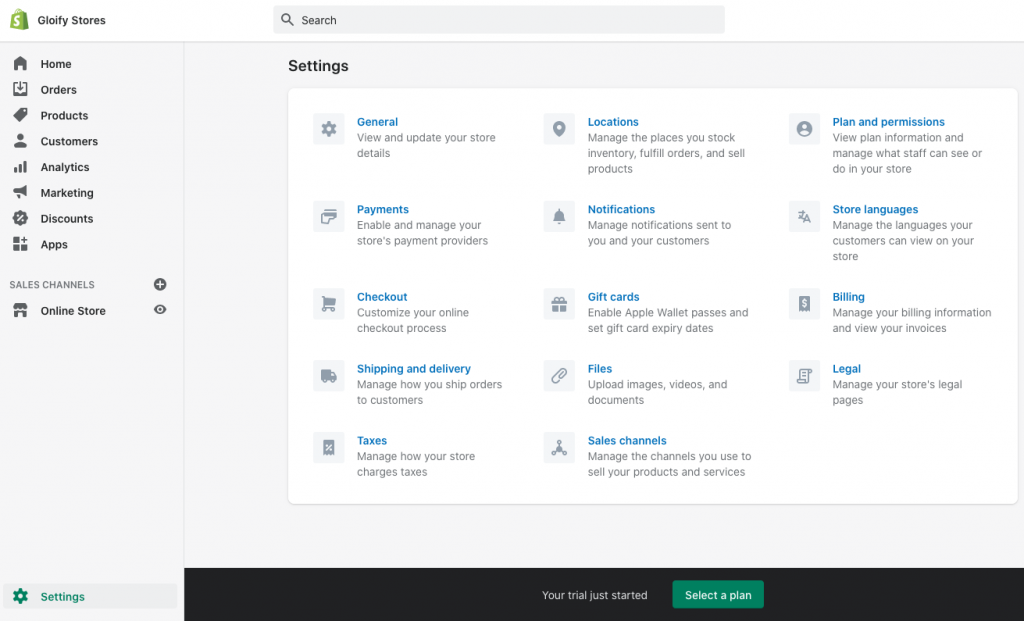
General Settings
From here you can edit your store name, email, store address, and more. If you changed your store name after signing up, update it now.
The Account email is the email Shopify will contact you through (customers won’t see this email). The Customer email is the email customers will contact you through.
Pro Tip: We recommend creating a support@yourwebsite.com email address for the customer email. You need a domain name to create one, which we will cover below. For your own email address rather than just email forwarding (highly recommended, a support@ email is best so you can have multiple people on your team use the same account if/when you start hiring), We suggest getting a G Suite account for your business.
Enter the details like, Legal name of your business if you have one, and edit your address if needed.
Next step is the Standards and formats section, where you set your timezone and standard information like weight units.
Don’t forget to SAVE your work!
Once the above mentioned settings are done its time to add payment gateway and do the checkout settings
Payment Provider Settings
In Settings go to payment provider settings, click the Complete account setup button to configure your payment gateway so customers can use credit cards to purchase.
Fill out everything on this page as this steps are important for successful payout. For the Product details box, write “Retailer of [your product category here]”. For example, “Retailer of Matcha Tea,” or “Retailer of health products” if you prefer to go broader.
Next, Statement Descriptor is what your customers will see on their billing statement. Make this your store or company name.
Fill out the remaining information and click Complete account setup.
PayPal should be set up automatically by Shopify. If not, set it up now. You can add other payment providers later, such as Apple Pay, but it’s not necessary now.
Checkout Settings
Under your checkout settings, switch Customer accounts to “optional,” and customers can create an account but aren’t required to. Next to Form options, check “Require first and last name.”
Email marketing
This the final and we recommend checking “Pre-select the sign-up option” to market to more of your customers.
Check out the remaining settings on this page and make sure they’re to your liking. If you’ve set up Google Analytics or your Facebook pixel, add your custom conversion code in the Additional scripts box. If you haven’t, there’s a video guide for doing this in the Preferences section of this post.
When you’re done, click Save.
Shipping Settings
Your shipping settings depend on how you ship.
If you’re drop-shipping: Use “Price based rates.” Someone with a $10 order can pay one rate, and someone with a $30 order can pay a different shipping rate.
If you’re shipping items yourself then use USPS’s Discounted rates for Shopify stores, it calculates shipping for you so your customer pays what it costs you to ship. (For this to work properly, have the correct size and weight entered on your product pages.)
Pro Tip: Regardless of how you ship, you can offer free shipping. We recommend to offer free shipping over a certain amount (i.e., free shipping on orders over $50). This strategy can increase your conversions and your average order value. Just make sure you advertise that you offer this on your site.
Account Settings
If you have a partner or a virtual assistant or wish to give access to someone in your team, you can give them an account on this page. Click Add staff account and choose what you want them to have access to.
Legal Settings
This is an important setting — without it, you’re operating illegally.
Every online store needs a Privacy Policy, a Terms of Service (ToS) Agreement and a Refund Policy.
Thanks to shopify, we can generate one from Shoipy based on the settings. Again, remember we are not lawyers and this is not legal advice. Once your store starts generating revenue, we recommend having an attorney review these documents for you.
Simply click the three Create from template buttons under each section.

Next, create pages for each document. Right-click Online Store and open it in a new tab (so it’s easy to copy and paste from the Legal settings page).
Under Online Store, click Pages then Add page.Title the first page “Refund Policy”. Go back to your legal settings tab and copy the entire refund policy, then paste it in the new Refund Policy page in the other tab. Click Save. Repeat for your “Privacy Policy” page and “Terms of Service” page.
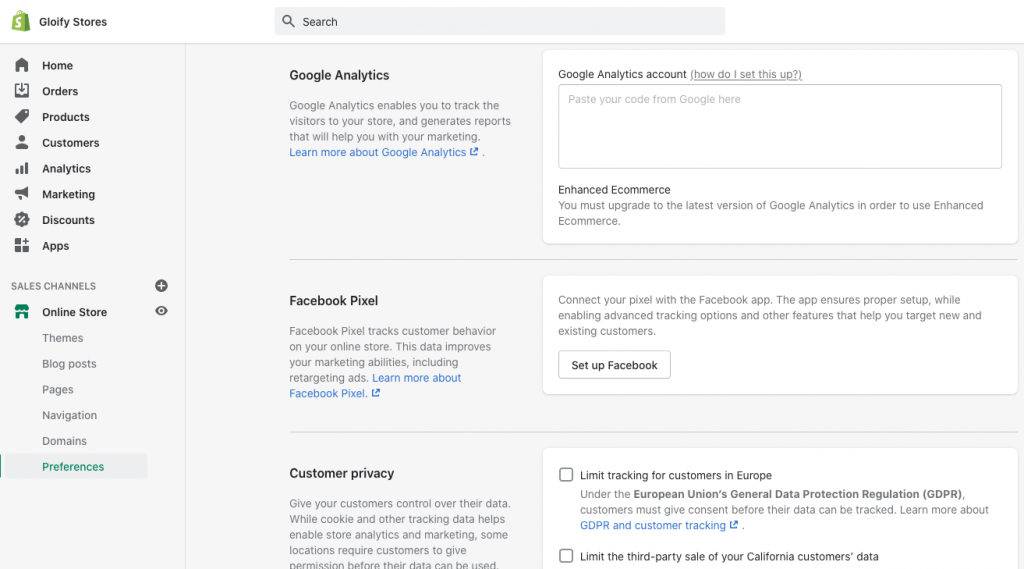
Preferences (SEO settings)
This is the only setting not under the “Settings” page; instead, go to Online Store > Preferences.
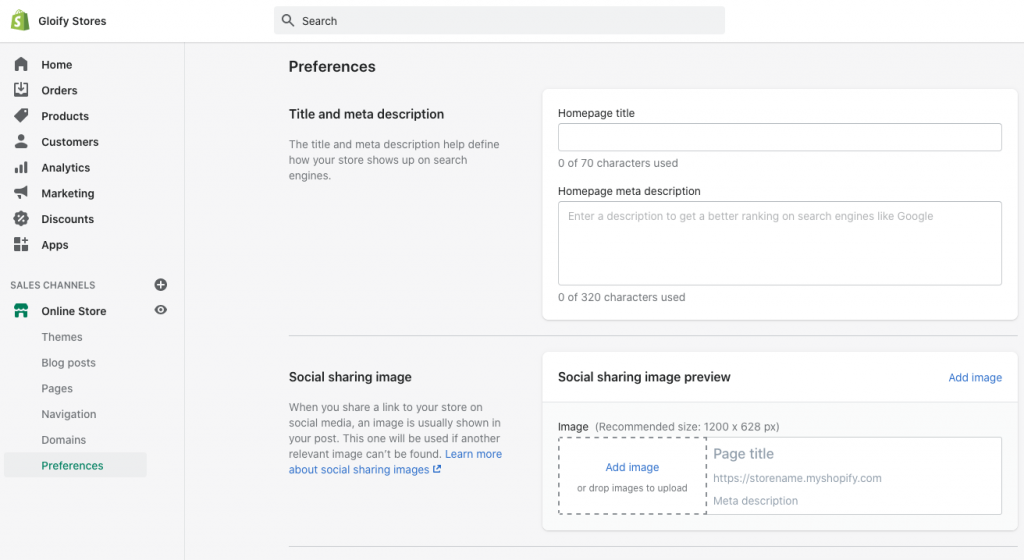
This is for the Shopify SEO settings
First, edit your store’s meta title and description — the text that appears in the search engines.
Tips:
- The max title length should be 60 characters;
- the max description should be 160 characters.
- Add your keyword in the title and description.
Think like a copywriter. Would you click this link if you saw it after searching for your product?
Next Step is to connect your Google Analytics account for traffic tracking.
Next, you’ll see the Facebook Pixel ID section; the video below explains the process. Again, you’ll need a registered domain for that.
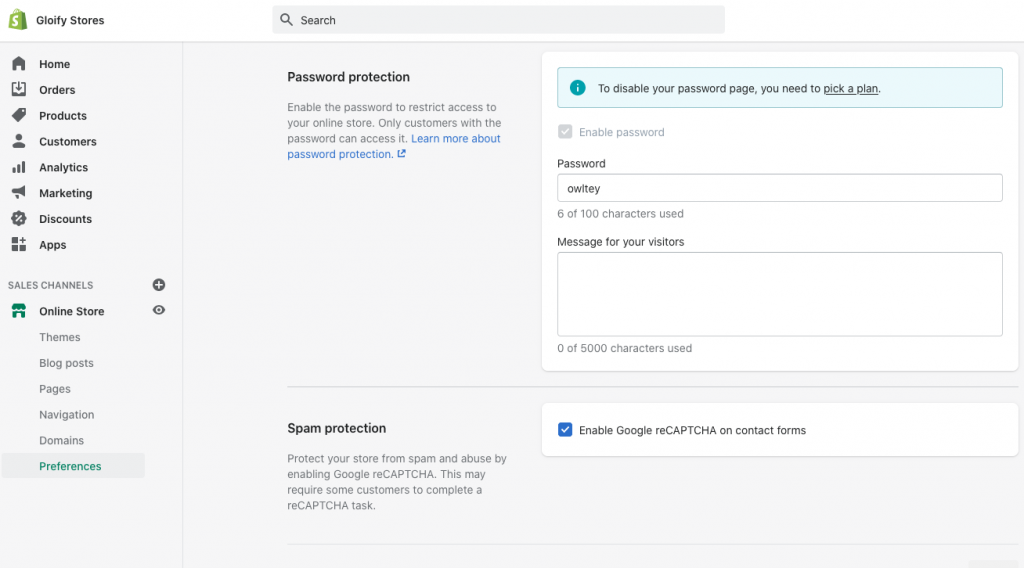
Next option is the store’s password is in the security section. You will need to disable the password so anyone can visit your site, but we don’t want to do that until your store is ready to publish, so we’ll come back to this later.
Registering your Domain with Shopify.
From your Shopify admin, go to Online Store > Domains. Click Buy new domain.
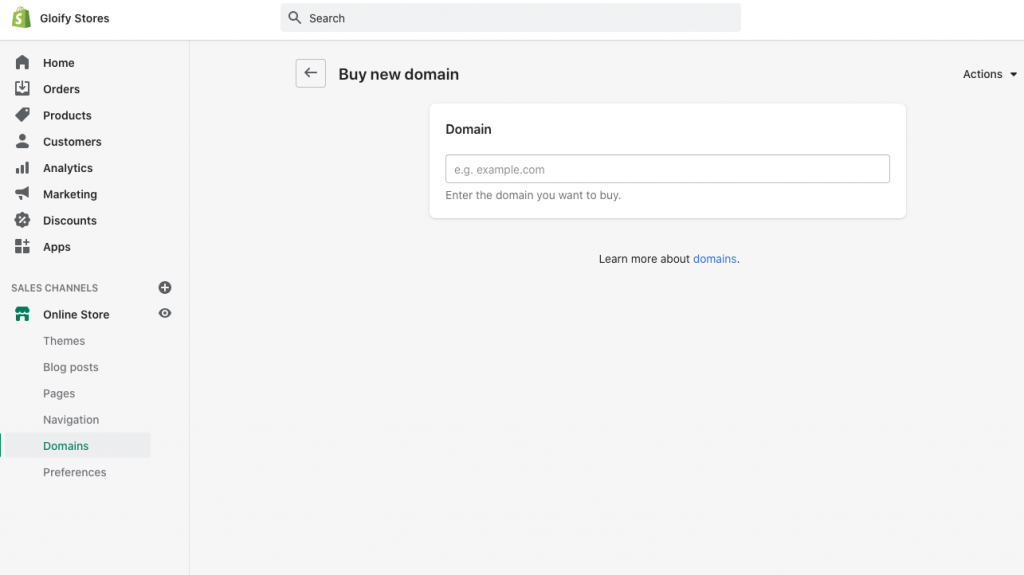
Enter the domain name you want to buy for your brand, if it is available buy it and you’re done! You now have your brands domain name. Make sure you go to your Domain settings and choose the domain you purchased to be your default URL.
6. Create your Essential Pages
Now that your settings are configured, Create this four pages, a must for every e-commerce store:
- About Us page: Having a great about us page for your brand is one of the best ways to build trust with your customers, talk about why you started your store, and share more about your brand. It’s also a great way to stand out, since most Shopify stores’ about pages suck.
- Contact Us page: Creating the contact page is easy. Click Add page, then in the drop-down menu under the Template section, choose “page.contact”.
- Shipping Policy page: Help your visitors understand how long shipping will take, if your store sells internationally, who will deliver their package, and how to track their purchase and you’ll get fewer customer service questions. This page is especially helpful if you’re dropshipping from overseas and have long shipping times.
7. Add Products to Your Store
Finally it’s time to add products to your newly created store, click Products, then Add product.
Title & Description
Enter your product’s title and detailed description. In your description, we recommend talking about the BENEFITS of your product first, the features second.
Images
Images are very important in selling a product online. If the quality of your images is poor, you’ll lose credibility and sales.
Organization
Product type is the type of product (i.e., phone, tea, toiletry, etc.) you sell. Product types are one way to create product collections, which we’ll talk about in a second.
Pricing
Pricing is straightforward. Your Price is the price customers will pay. Your Compare at price will be shown crossed out next to your actual price to use price anchoring, a conversion optimization strategy.
Inventory
Your inventory settings help with keeping track of inventory. You can create a custom SKU for your products if you want. Otherwise, you can leave these settings alone.
Shipping
Your shipping settings only need to be adjusted if you’re shipping your products using the USPS Discounted Rates for Shopify. (If you’re not sure if you need this, you probably don’t.) Otherwise, you can leave this alone.
8. Create your Collections
A collection is a group of similar products, based on tags, types, vendors, etc. They help your customers find similar products. For example, “Men’s Shoes” could be a collection.
Collection Title & Description
Like product pages, your collection pages also have a title and a description. However, you don’t need a description — it’s just a paragraph that shows up above your products. It can help with SEO, but can also be a distraction. It’s best to do this once you have at least two products in a collection.
9. Add Discount Codes
Note: This step is optional and shows you how to create discount codes. Skip to Step 10 if you don’t want to offer discounts on your store.
To add discount codes to your store, go to Discounts > Codes then name or generate your code, set the parameters (like $10 off, 10% off, only on orders over $50, etc.).
10. Get Familiar with your Orders Page
To manage your orders and fulfill them, you have to go to the Orders page.
Note that you can’t see this page until you select a plan for your store. You still get 14 days of your free trial, but once you select a plan, it expands what you can do and you’ll be charged after 14 days.
On the orders page, you’ll see any orders that come in, the customer’s details (address, item purchased, etc.) and order’s status. After an order has shipped, you’ll need to update the order to “shipped”.
11. Setup your Analytics and Review your Analytics
You will have to get familiar with your Analytics page. Here you see how much traffic your store is getting, what pages users are visiting, what items are selling the most, and more.
12. Add these Recommended Apps
Apps are software you can download that add functionality to your store, like customer reviews or discount pop-ups. Some are free, some are paid. There are thousands of apps for addons.
GET THE CHECKLIST TO LAUNCH YOUR STORE
If you followed along and published your store — congratulations!
Follow this basic Step-by-Step Guide to Setup Shopify Website and start your online e-commerce journey. For experts advice or any details on advance Shopify setup and Marketing needs Contact our Expert team